When it comes to mobile operating systems, Android usually steals the show. You won’t believe it, but millions of users right now use android.
What is Error Code 910?
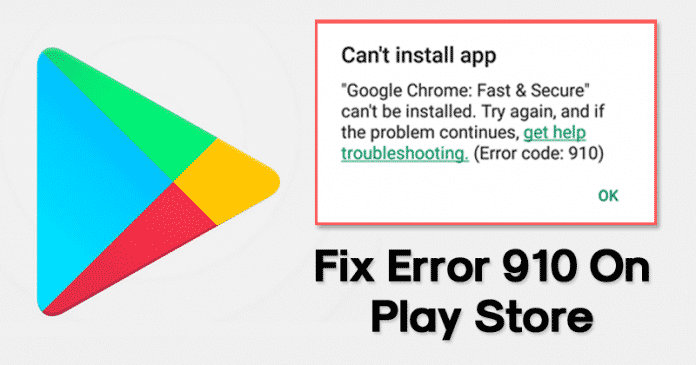
It’s a Google Play Store error that usually occurs while installing apps from the Play Store. It prevents users from installing or updating the apps. The full error message reads, “*App name* can’t be installed. Try again, and if the problem continues, get help troubleshooting. (Error Code: 910)”
Now you all might be wondering the reason behind the ‘Error code 910’? Well, it mostly occurs due to corrupted data and cache files. It can also occur when the destination file is not accessible or due to a glitched Google Account.
Whatever might be the reason, in this article, we have shared some of the best methods to fix Error 910 on the Google Play Store.
How to Solve Google Play Store Error 910
To Fix Google Play Store error code 910, users need to follow some of the simple methods given below. So, let’s check out how to fix Error 910 ‘Can’t install app’ error message from the Google Play Store 2019.
1. Clear Google Play Store Cache File
The Play Store Error 910 mainly occurs due to corrupted cache files and data. So, in this method, users need to clear the Google Play Store cache & data to fix the error message. Follow some of the simple steps given below to clear Google Play Store Cache & data.
2. Re-Link Your Google Account
The troubleshooting guide provided by Google to fix Error 910 on the Google Play Store recommends users to re-link their Google Account.
Compared to every other mobile operating system, Android provides users far more customization options. Not only customization, but the app availability is also quite high on Android.
However, just like every other mobile operating system, Android is also not entirely free from bugs. On regular usage, Android users often deal with system errors, Google Play Store errors, etc. One such error is known as ‘Error Code 910’
However, just like every other mobile operating system, Android is also not entirely free from bugs. On regular usage, Android users often deal with system errors, Google Play Store errors, etc. One such error is known as ‘Error Code 910’
What is Error Code 910?
It’s a Google Play Store error that usually occurs while installing apps from the Play Store. It prevents users from installing or updating the apps. The full error message reads, “*App name* can’t be installed. Try again, and if the problem continues, get help troubleshooting. (Error Code: 910)”
Now you all might be wondering the reason behind the ‘Error code 910’? Well, it mostly occurs due to corrupted data and cache files. It can also occur when the destination file is not accessible or due to a glitched Google Account.
Whatever might be the reason, in this article, we have shared some of the best methods to fix Error 910 on the Google Play Store.
How to Solve Google Play Store Error 910
To Fix Google Play Store error code 910, users need to follow some of the simple methods given below. So, let’s check out how to fix Error 910 ‘Can’t install app’ error message from the Google Play Store 2019.
1. Clear Google Play Store Cache File
The Play Store Error 910 mainly occurs due to corrupted cache files and data. So, in this method, users need to clear the Google Play Store cache & data to fix the error message. Follow some of the simple steps given below to clear Google Play Store Cache & data.
- Step 1. First of all, open Settings and open the Apps. Under the Apps, tap on the ‘Installed Apps’ section.
- Step 2. From the list of apps, tap on the ‘Google Play Store’ option.
- Step 3. There you need to tap on the ‘Clear data’
- That’s it, you are done! Now just restart your Android device to fix the Error 910 on Google Play Store.
The troubleshooting guide provided by Google to fix Error 910 on the Google Play Store recommends users to re-link their Google Account.
This thing fixes any account related problems. So, if you are getting the Error code 910 prompt due to incorrect account settings, then this method would fix the problem.
- Open the app drawer and then tap on the ‘Settings’
- Under the Settings, tap on the ‘Accounts’
- Under the Accounts, you need to select the current Google Account and then tap on ‘Remove’
- Once removed, restart your Android device and then re-add the Google Account.
- Once done, restart your Android device to fix the Google Play Store error message.
3. Update DNS
Some users have claimed that they have fixed the Error code 910 from Google Play Store by switching DNS. So, in this method, we are going to use Google DNS to fix Error 910 on Google Play ‘Can’t install app’.
That’s it, you are done! Now just reconnect to the WiFi network and download the app. You won’t get the Google Play Store Error Code 910 anymore.
Some users have claimed that they have fixed the Error code 910 from Google Play Store by switching DNS. So, in this method, we are going to use Google DNS to fix Error 910 on Google Play ‘Can’t install app’.
- First of all, open Settings and tap on ‘WiFi
- Long press on the connected WiFi and tap on ‘Modify network’
- Once done, tap on the ‘Show advanced options’
- In the next step, tap on the drop-down icon behind IP Settings and select ‘Static’
- Under the DNS 1 and DNS 2 field, enter – 8.8.8.8 and 8.8.4.4.
- Finally, tap on the ‘Save’ button.
That’s it, you are done! Now just reconnect to the WiFi network and download the app. You won’t get the Google Play Store Error Code 910 anymore.

